VPC Flow Logs in AWS: How to Monitor Traffic at the Edge of Your Cloud Network
Summary
VPC Flow Logs are a necessary form of network telemetry to deliver network observability for cloud. Dan Rohan discusses different models for gathering VPC Flow Log data and the advantages of each.
At Kentik, we’ve been ingesting and analyzing AWS VPC Flow Logs since 2018. Through the hundreds of customer conversations we’ve had, we’ve heard a widespread (and totally false) belief that AWS VPC Flow Logs must be configured to monitor every single part of your VPC environment — and thus are too expensive to set up as part of a comprehensive monitoring strategy. The truth is that while flow logs do cost money, AWS has provided knobs that you can turn to keep your costs reasonable while still getting the visibility you need. In this blog, I’ll walk you through how you can configure your AWS environment to target precisely what you want to monitor — nothing more, nothing less.
The “Gimme Everything” Approach to VPC Flow Logs
Before I get too deep into the technology, I should mention that there’s totally a benefit to setting up logs carte-blanche across your VPCs. If you have flow logs turned on everywhere, you’ll never feel the burning regret of not having traffic logs when you really need them. Think about what information you’ll need to find out which EC2 instance hogged a VPN connection or what service drove up costs on your NAT gateways, and so on. But turning on VPC Flow Logs everywhere might not fly in larger environments — because these logs cost real money — and no one wants to pay for something unless they understand the value for doing so.
So, if you’re not running mega-behemoth VPC infrastructure, then it’s totally possible to turn on logging everywhere without causing your CFO to barf. It also happens to be the easiest way to get started. You can begin producing logs within a few minutes, just by flipping a switch on each of your VPCs. Simply navigate to Your VPCs, select a VPC and then hit the “Enable Flow Log” button from the “Flow Logs” tab in the detail pane. Follow the instructions to set up flow logs to publish to an S3 bucket, and away you go.
Cloud optimization is crucial to delivering software with lean infrastructure operating margins and enhanced customer experiences.
Monitoring Your Cloud Edge: Easier Said Than Done
While setting up global VPC Flow Logs takes just a few minutes, building logs that only capture inter-VPC flow and internet flows can take a bit more time and thought. Gaining visibility here is one of the most powerful steps you can take to optimize and secure your cloud — helping you defend against cyber attacks, improve your customers’ digital experience, and save money on your data transfer bill.
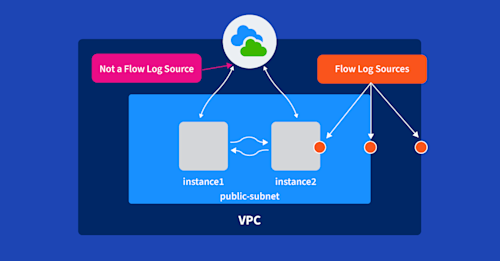
But we have a small problem. AWS doesn’t easily allow you to configure flow logs for this use case. You simply can’t configure flow logging on internet gateways, which would seem like an obvious place to do so. Internet gateways aren’t manageable or monitorable constructs in your VPC; they just exist as route targets in your VPC’s route table. Flow logs are generated only from VPCs, subnets, and network interfaces.
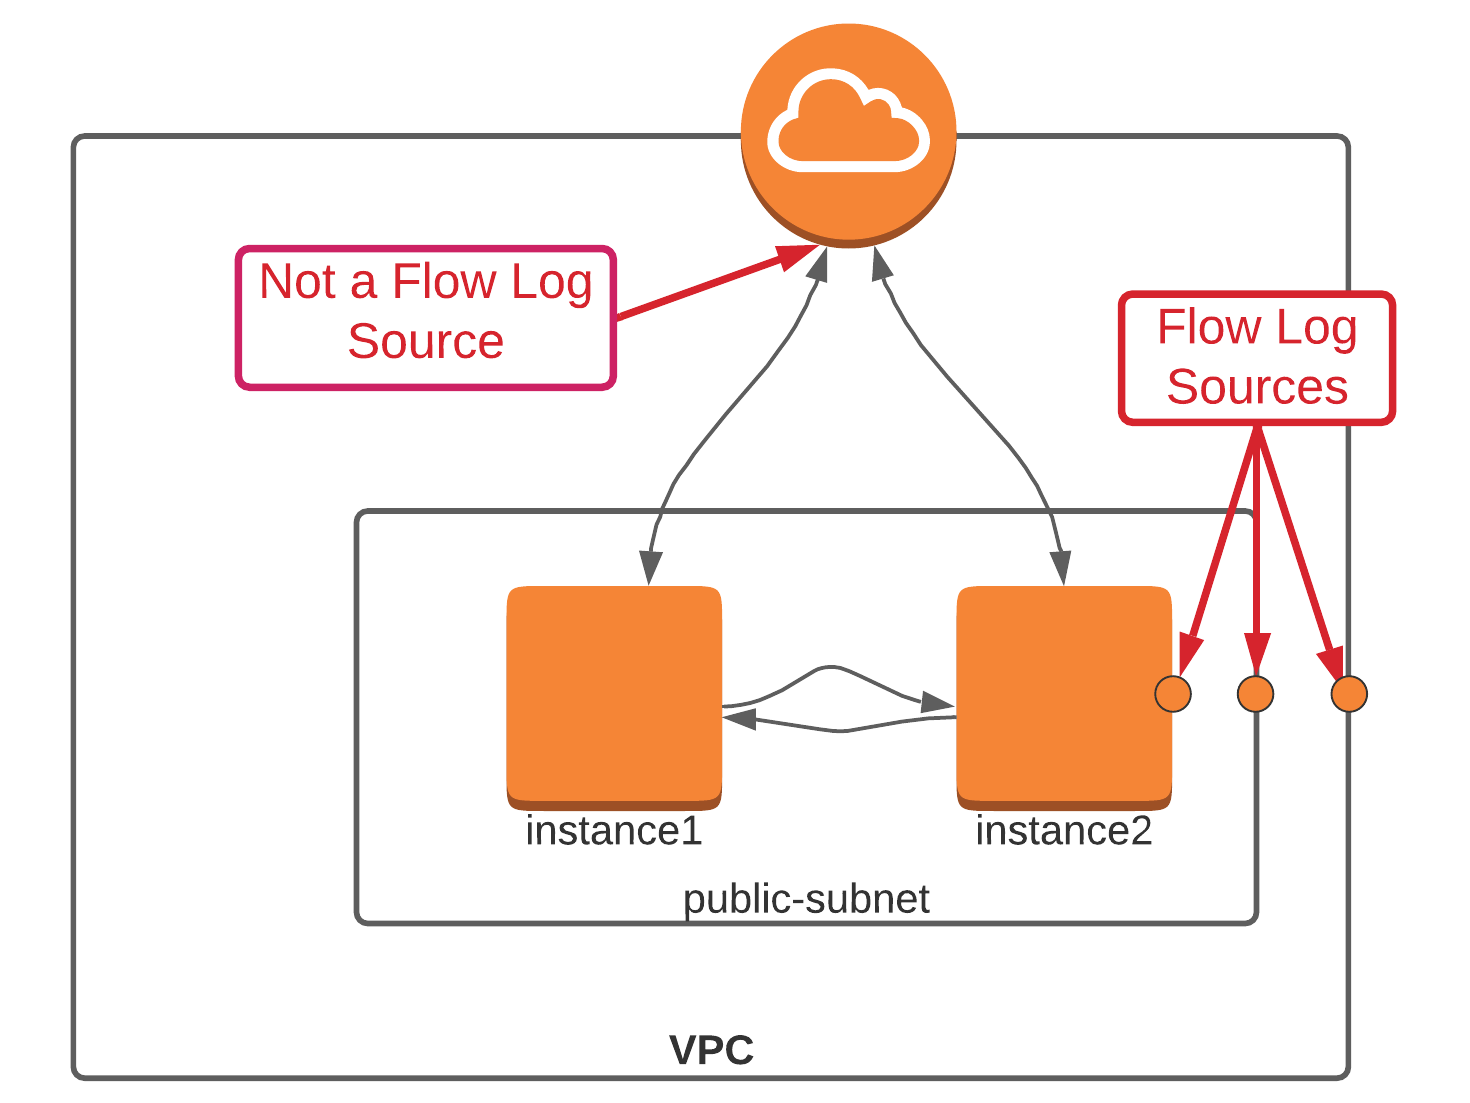
Nonetheless, this limitation provides us with enough flexibility to monitor almost any traffic flow, so let’s dig in.
Configuring a Transit VPC
At a high level, our goal is to insert a flow log source into the data path between your VPCs and the internet. This is sometimes considered a “transit VPC” or “transit hub.” This is essentially a VPC that acts as an aggregation point for all of your VPCs and infrastructure, like site-to-site VPNs, direct connects, and other VPCs. Once the transit VPC is configured, we just need to turn on flow logging on the specific peering interfaces connecting the transit hub with your workload VPCs.

Here are the steps we’ll want to follow:
Build a new VPC. Build your new transit VPC in the same account or a different account from your original VPC(s). If you choose to build this in a different account, then you’ll have to also address cross-account IAM policies (which are beyond the scope of this post). Don’t use the Launch VPC Wizard from the VPC Dashboard — instead, head over to “Your VPCs” and click on “Create VPC” to ensure that AWS doesn’t try to preconfigure needless cruft that you’ll have to delete later. Lastly, attach an internet gateway to the VPC.
Add subnets. Add public and private subnets to the new transit VPC. Private subnets are useful in transit hub architectures as these are great places for cloud and network operations teams to place bastion hosts and other shared services that need to be in the center of the action. Ensure that the subnets you configure here don’t overlap with any of the subnets already configured in your existing VPCs.
Establish VPC peering from your new VPC to your existing VPC(s). VPC peering allows you to establish private connections between one or more VPCs. It takes just a few seconds, and the AWS docs to set this up are easy to follow. If your existing VPCs already have internet gateways, don’t delete them! Keep them around until you’re sure that you’ve got everything routing properly.
Configure a NAT gateway (optional). Adding a NAT Gateway to the public subnet of your transit hub VPC is a critical step to allowing private instances access to the internet. If you don’t have any private subnets, you can skip this step.
Configure routing. The secret sauce to making a transit hub architecture work is in how you configure your routing. First, you’ll want to set up routes in the transit VPC. Configure a default route in your public subnet to point all traffic towards the internet gateway. Then, in the private subnet, you’ll want to configure a default route to point at the NAT gateway that sits in the public subnet. I’d recommend spinning up an instance in each to make sure that public and private connectivity are working.
Once you’ve set up your transit VPC, then move down into your existing VPCs. I’d recommend proceeding with caution here — it might be worth setting up a test VPC with a test instance inside it to ensure you’ve got everything nailed down just so. In these VPCs, you’ll need to set up a new default route that points at the peering interface installed previously.
Configure flow logs. Setting up flow logs now is just a simple matter of choosing which interfaces through which traffic is aggregated. In this example, we’d choose one of the two peering interfaces that connect the Application VPC to the Transit Hub VPC and, optionally, the NAT gateway interface.
Monitoring Transit Gateways with VPC Flow Logs
Many companies have moved away from plain old VPC peering towards the AWS Transit Gateway. For a nominal hourly charge (plus data transfer costs), Transit Gateways replace transit hub architectures with a more scalable service that doesn’t require users to set up a mesh of peering links. Instead, Transit Gateways act as cloud routers by maintaining their own routing tables and attachments. Transit Gateways support interconnecting not only your VPCs, but can also support attachments to other Transit Gateways in different regions, as well as Direct Connects and site-to-site VPN connections. Taken together, this means that Transit Gateways are a game-changer for organizations that are building out their cloud infrastructure at a large scale.
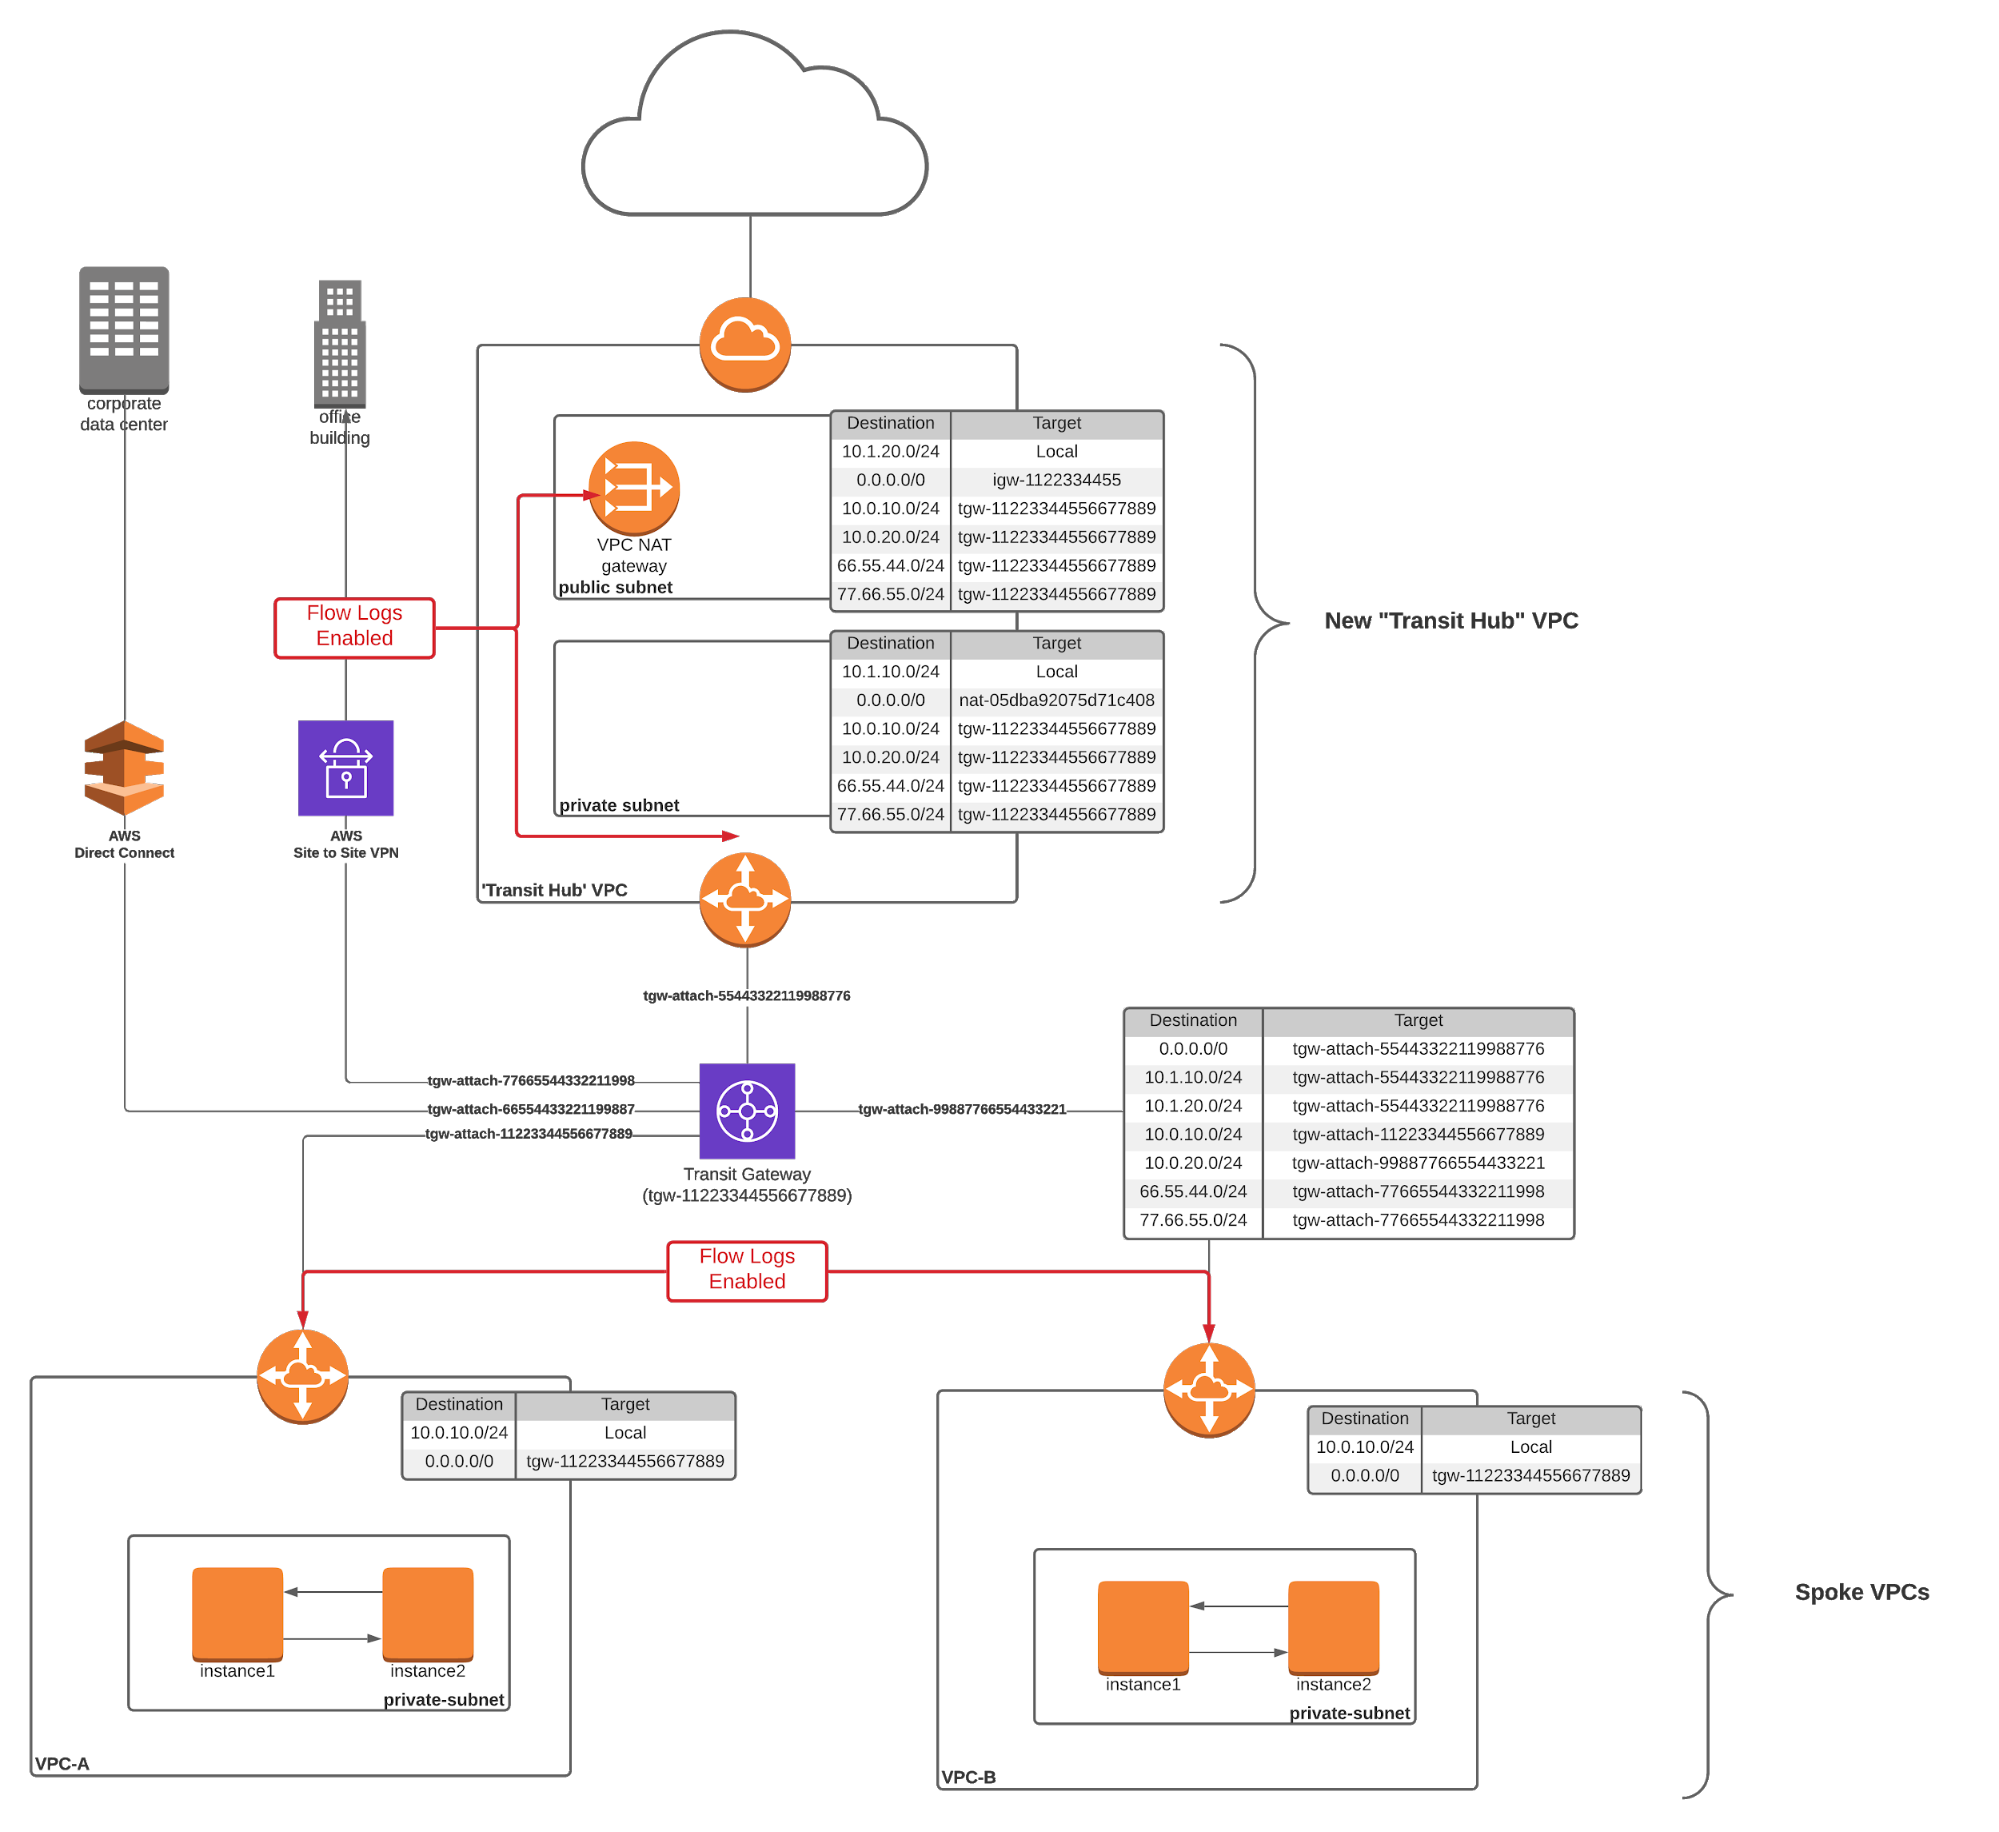
To set up north-south and inter-VPC Flow Logs with a Transit Gateway, all you need to do is set up flow logs on the attachment links that connect your VPCs to your Transit Gateway. One way to quickly instrument this change is to configure flow logs on an interface basis. To do so, just navigate to the “EC2 > Network Interfaces” page in the AWS console and search for the string “gateway.” Select your gateway interfaces and then choose “Create Flow Log” from the “Actions” menu.
Note that while you can’t configure flow logs on the interfaces that connect the transit gateway to other Transit Gateways (or Direct Connects and SSL VPNs), this isn’t usually a big deal. Flows through this infrastructure generally originate or terminate in one of your attached VPCs, which means that traffic logs will still be created. This can become slightly problematic if you want to capture traffic to public AWS services that are carried over a public virtual interface through your Direct Connect infrastructure (i.e., traffic from your on-prem infrastructure to public AWS S3 IP addresses or other publicly available AWS services). But even this isn’t a problem because you can usually set up NetFlow, sFlow or IPFIX on your on-prem routers or VPN concentrators to log this traffic.
Analyze Your VPC Flow Logs!
Now that you’ve set up flow logs and they are accumulating in an S3 bucket, it’s time to start digging in. You can certainly build your own analysis tool (and AWS has a good primer), but I recommend elevating your game by adopting a comprehensive network observability strategy with Kentik. Just sign up now for a short demo and learn more about how you can use Kentik to secure and optimize your cloud.
To go further, watch Dan’s webinar How to Troubleshoot Routing and Connectivity in Your AWS Environment.


